|
|
VSAAB
-- The Vintage SAAB Information Source! VSAAB Articles Engine Compartment Detailing |
 |
|
|
VSAAB
-- The Vintage SAAB Information Source! VSAAB Articles Engine Compartment Detailing |
|
|
One thing that all show cars have in common is a beautifully detailed engine compartment. Car show judges will either pass by a car without it�s hood up or take off so many points that getting an award will be next to impossible. To what extent you detail your engine compartment is entirely up to you, but to win you have to outdo the next guy. The quality of your work will be reflected in the longevity of the finished product. A properly detailed engine compartment will clean up like new for years. In the last few years the number of concours quality vintage Saabs has increased dramatically. Saabs are finally getting the recognition they deserve at shows in the US and Europe. If you are interested in helping the vintage Saab cause you should consider restoring your car, and one place that will require a lot of attention is the engine compartment. This article will address detail work only. Needless to say, if a part is removed it�s a great time to replace or rebuild it. Also keep in mind that there is more than one way to skin a cat, so my suggestions are just that... suggestions. Remember to click on the images for a closer look! |
|
|
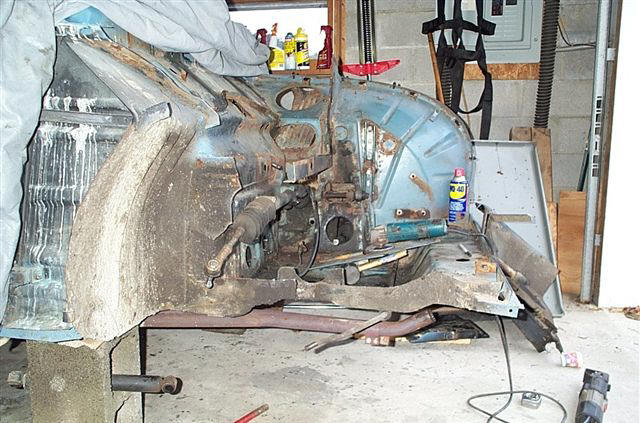
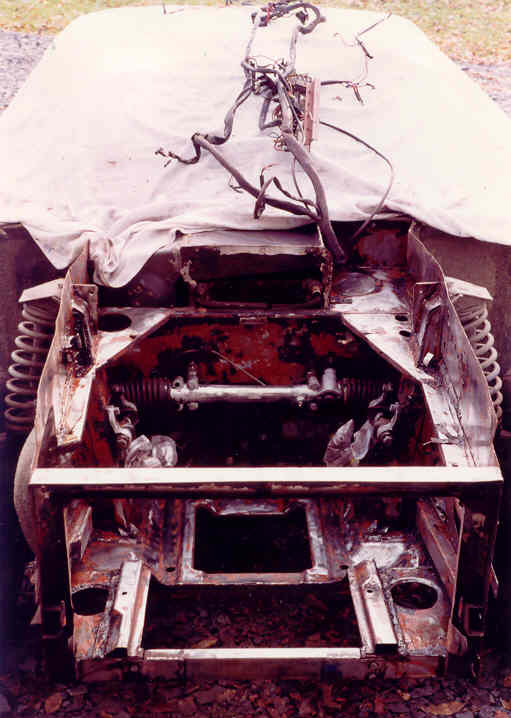
Puttyus Maximus "worst case scenario" -- can it be detailed to concours standards?
Two months later with NOS
inner wheel well installed. |
Preparation Step one in any detail job is emptying the engine compartment. Start by spraying the engine compartment with a degreaser like �Gunk� and rinse out with a garden hose or power washer. After a thorough cleaning, drive the car for a while and check for leaks. Better to find oil, transmission and coolant leaks now than after the detail work has been completed. Organization Unless you are intimately familiar with every component in your engine compartment, it will be necessary to remain extremely organized throughout the project. Consider some or all of the following; Photograph and/or video tape the engine compartment before and during the removal process. Describe what you are doing into a cassette recorder. Make drawings showing the location of wires, hoses, cables etc. Put small parts and fasteners in paper cups and label them accordingly. Take note as to what order the parts are removed, so they can be reinstalled in the reverse order. If you find yourself saying, �I�ll remember that�, it�s a safe bet that you won�t. Work Begins Remove the engine, transmission, wiring harness and all other components in the engine bay. The only component that can usually be left behind is the steering gear (rack and pinion) since it rarely conceals rust and can be easily worked around. The easiest way to remove the paint from the engine compartment is by sand blasting. The next best way is with a commercial quality paint remover, followed by my least favorite, disc sanding. Regardless of which method you use, hours of hand sanding will be needed to smooth out the tight spots. Before painting, minor pits in the metal or swirl marks from sanding should be filled in with finishing putty.
|
|
Prior To Painting Under every high quality paint job lays a coat of primer. Before priming, remove the seam sealer from the base of the firewall. Clean the engine compartment with a commercial metal cleaner like �Kleans Easy� available from NAPA stores. Prime the metal per the manufacturers instructions and allow to cure. Replace the seam sealer. Spray cans are adequate for painting the engine compartment but for truly professional results a spray gun must be used. Many restorers are recommending epoxy enamel paints, as they are resistant to gasoline, oil, antifreeze and brake fluid. Engine/transmission painting The engine and transmission will have to be absolutely clean to insure proper paint adhesion. If you're rebuilding the engine, have the engine block boiled by the machine shop to remove any deposits in the coolant and oil passages. This will also help dissolve the old paint making paint preparation much easier. Different parts of the engine should be coated with different types of paint. On a V-4 for instance, the area around the exhaust ports should be coated with high temperature manifold paint instead of engine enamel. A great source for engine enamel is Bill Hirsch Inc. Their paint is expensive, but if applied correctly will last for years without discoloring or peeling. The transmission case can be cleaned and painted too. Though the transmissions came from the factory unpainted (except for some early two-stroke transmissions), they can be painted with brush on aluminized engine enamel for a concours appearance. Expect to spend many hours cleaning every nook and cranny of the engine and transmission with a combination of wire wheels, steel wool, sandpaper and solvents. Wiring The wiring harness should be cleaned or, if necessary, re-wrapped. My preference for cleaning the wires is to use paint remover, but not to leave it on for more than a minute. Just wipe it off with a rag. This procedure removes oil and most discoloration from the wires insulation and wiring harness cover, leaving it looking good as new. Do not use paint remover on the numbered wire connector covers because it will remove the numbers instantly! If your wiring harness cover is torn and beyond repair, it will be necessary to re-wrap the harness with new shrink tubing. This is a delicate job that requires quite a bit of patience. To re-wrap the harness, start by spreading it out on a piece of plywood, separating all the �branches� as far as possible. To hold the harness in place, tap finishing nails every few inches on either side of the harness at an angle. This will trap the wires in place during the harness removal process. Using a razor knife, slit the cover lengthwise, being extremely careful not to damage any wires, then pull the cover off. The wiring harness cover
is made of plastic shrink tubing and can be purchased from: Hoses, Clamps, Rubber and Plastic Parts Replace all heater hoses and fuel lines. If using NOS (new old stock) hoses, check for dry rot before installation. Some original two-stroke hoses had very interesting nylon braiding on the exterior of the hose. If you know where buy this stuff by the foot, please let me know! Sonetts came from the factory with a combination of black and red heater hoses. Although it�s impossible to be sure, the consensus is the upper and lower radiator hoses are black and the balance of the heater hoses were red. Red heater hose is still available at some auto parts stores. If you're using generic heater hose and want to remove printing from the hose, just wipe the printing off with a little paint remover. Tip! Old sales brochures can help immeasurably in proper color coordination and placement of various components. Hose clamps are another part that will have to be addressed. The Sonett III uses screw type clamps similar to modern screw type clamps. I haven�t been able to find a source for exactly the same as originals but I�m sure they are available somewhere. The Sonett II, Sonett V4 and some strokers use �tower clamps� here and there. Strokers also use wire spring clamps that require a special pair of pliers for easy installation. Tower clamps and wire spring clamps can be purchased from
Restoration Specialties
and Supply, Inc. Tip! If you�re in the mood for a scavenger hunt, wire spring clamps can be salvaged from the water pump connection on old washing machines! Soft parts are
the most difficult to find NOS. These are the rubber and plastic
pieces that dry out, crack or fade with age. Rubber parts such as
grommets and body seals can sometimes be brought back to life by
cleaning with paint remover. Test a small area first to see if the paint
remover will damage the part. If it doesn�t, rub in the paint
remover and wipe off with a rag. The part should be washed off with soap
and water, and then sprayed with a rubber preservative like Armor All
before installation. Some plastic parts can be cleaned with paint
remover, but others will literally melt on contact! Supplies, Tools, Sources Most detail work involves the removal, cleaning and painting of parts. The list of suppliers of detail tools, paints and products is seemingly endless. Hemmings Motor News has a section for �Services Offered� and �Supplies, Tools & Misc.� Hemmings may be purchased at the newsstand, or you can subscribe by calling (800) 227-4373, ext. 550. Another excellent source for detail supplies is the Eastwood Company. You can order their catalog by calling (800) 345-1178. They list dozens of aerosol spray products alone, including wrinkle finish paint (for Sonett dash boards) and chassis black-epoxy base, for coil springs. Some of the tools necessary for detailing include a bench grinder with a wire and buffing wheel, electric drill with various size wire wheels, Dremel Moto-tool with an assortment of tips, and don�t forget a truckload of rags and a big box of Band Aids. Don�t forget the basics Here is a list of tips to help your detail job run smoothly:
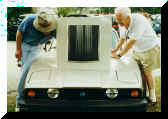
Good luck -- I�ll see you on the Concours circuit! |
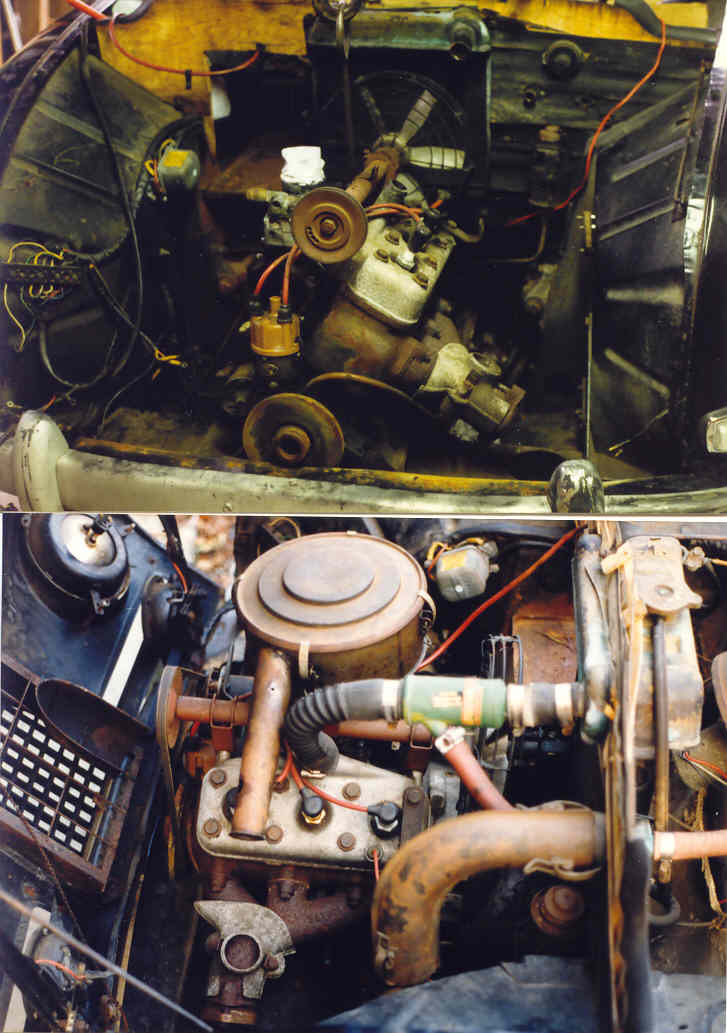
93B -- Before
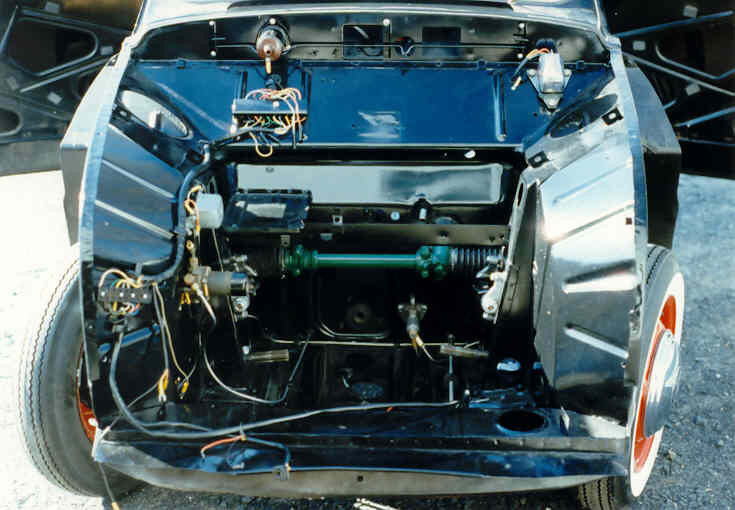
93B with engine compartment sanded, primed and with finishing putty applied.
93B engine compartment enamel coated
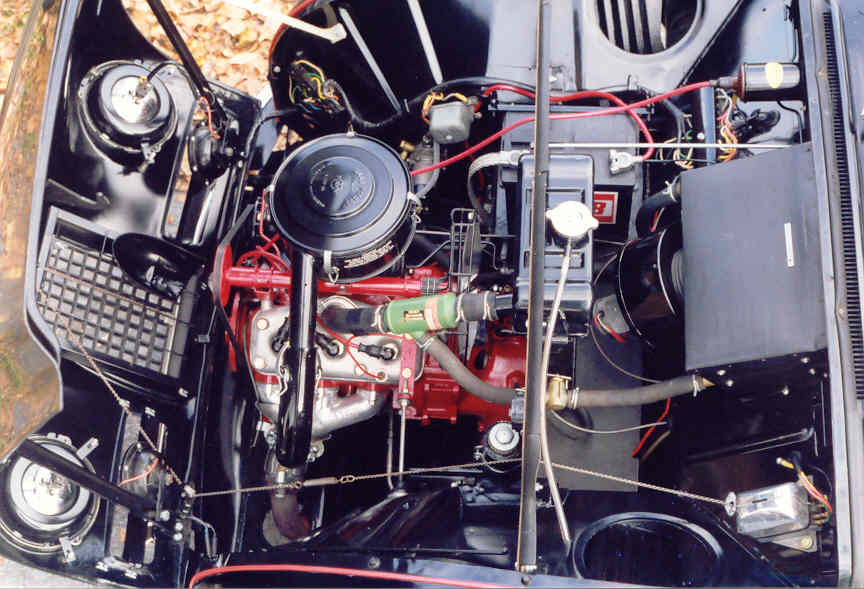
93B completely detailed and ready for show
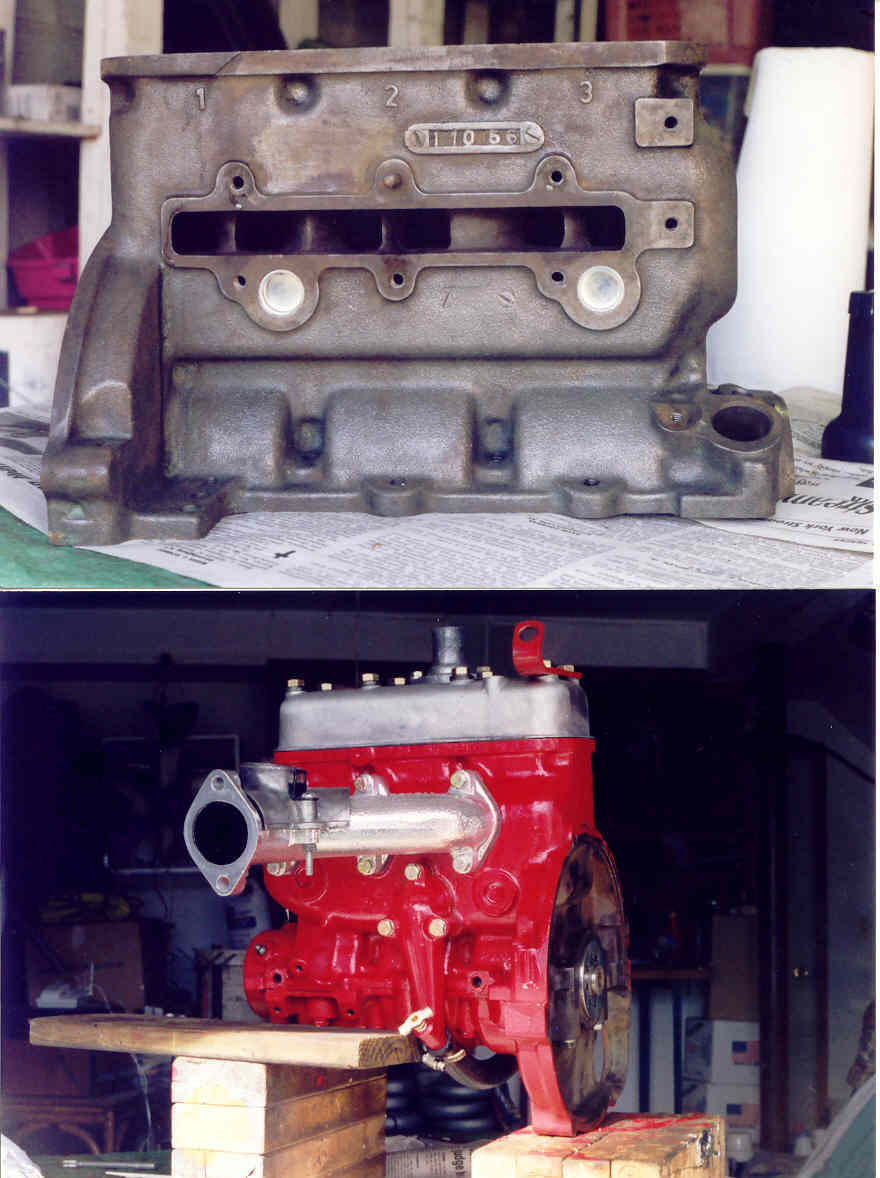
The block must
be perfectly clean for proper paint adhesion.
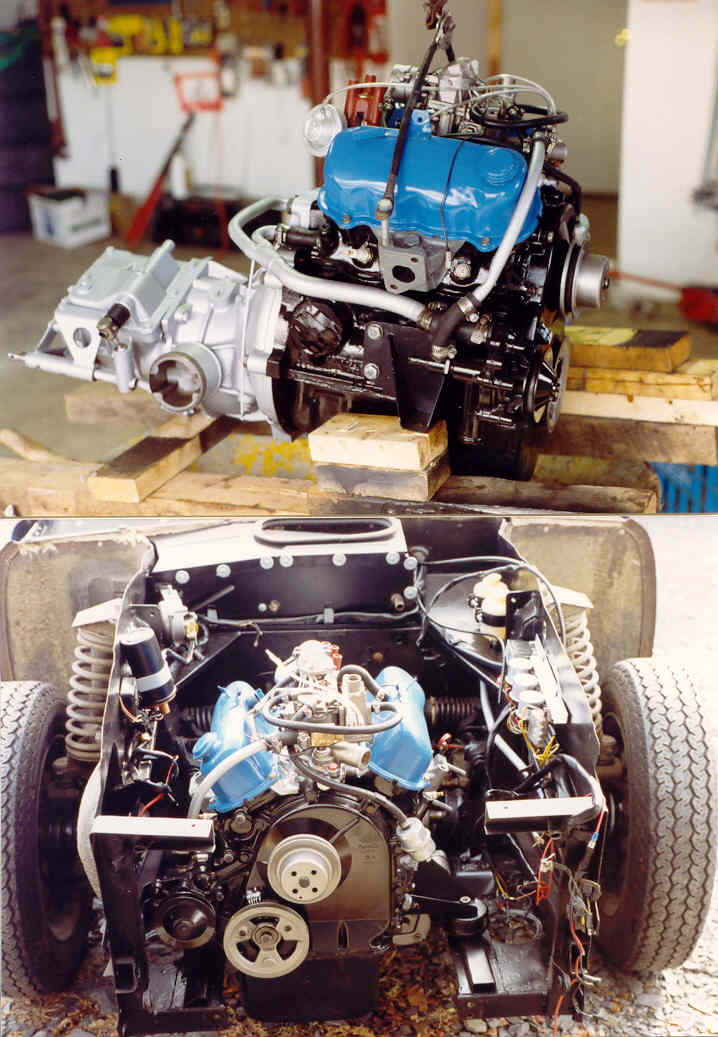
1974 Sonett being prepared for primer
Fully detailed
1974 Sonett III engine. |
So, what do you think of this? Send us your thoughts and comments by clicking HERE!
|
Help keep VSAAB alive and well! Click the icon to use PayPal for your donation, and THANK YOU! |
All product and trade names
mentioned on this site are the trademarks of their respective companies.
�VSAAB,
2003 All rights
reserved. VSAAB is not affiliated with SAAB Cars USA or SAAB Automobile.
"VSAAB" is a trademark of the San Diego SAAB Owner's Group, San
Diego, California USA.
All information here is presented as personal opinion. Ask, think, do.
Last modified: January 10, 2023